Posts Tagged ‘account management features’

New Rules for Changing Domain Ownership

Tuesday, October 4th, 2016

ownershipOn December 1st, 2016, ICANN will require all accredited registrars significantly change how they handle domain ownership changes.  Briefly, it will no longer be possible to update the domain owner’s contact information by simply logging in to manage the domain and submit a new set of contact data.

Inter-Registrar Transfers

Currently, the only type of transfer of a domain that requires confirmation is the Inter Registrar transfer which is governed by ICANN’s Inter Registrar Transfer Policy.  The process of transferring a domain from one registrar to another will still follow the confirmation process with the domain’s current administrative contact.  The current contact must click a link sent to the contact in the current Whois record for the domain being transferred.  The admin contact must confirm the transfer with the current registrar, and may confirm the transfer away from the current registrar.

Inter-Registrant Transfers

New starting in December will be the process of confirming changes in the owner contact of a domain.  When there is a change in the owner contact’s first or last name, organization name, email or telephone number, a new confirmation process will be triggered.  The process is as follows:

  • Register4Less (R4L) will first check if the domain name is eligible for a change in the owner’s contact.  If the domain is not, the contact update will not be saved and a message presented to the user stating why the domain cannot be updated at this time.
  • R4L will send an email to the current owner contact requesting they (or their designated agent) approve the change.  If that email is not responded to favourably, the contact change is rejected.
  • Once confirmed by the current owner contact, R4L will send an email to  the new owner contact requesting they (or again, their designated agent) approve the change.  Note, the previous and new owner contact may be the same address.  Both emails need to be confirmed in order for the update to complete.
  • If / when both confirmations are positive, R4L will then send an email to both contacts confirming the update.

The R4L Team will post updates to this procedure as they develop.
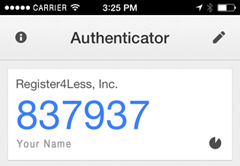
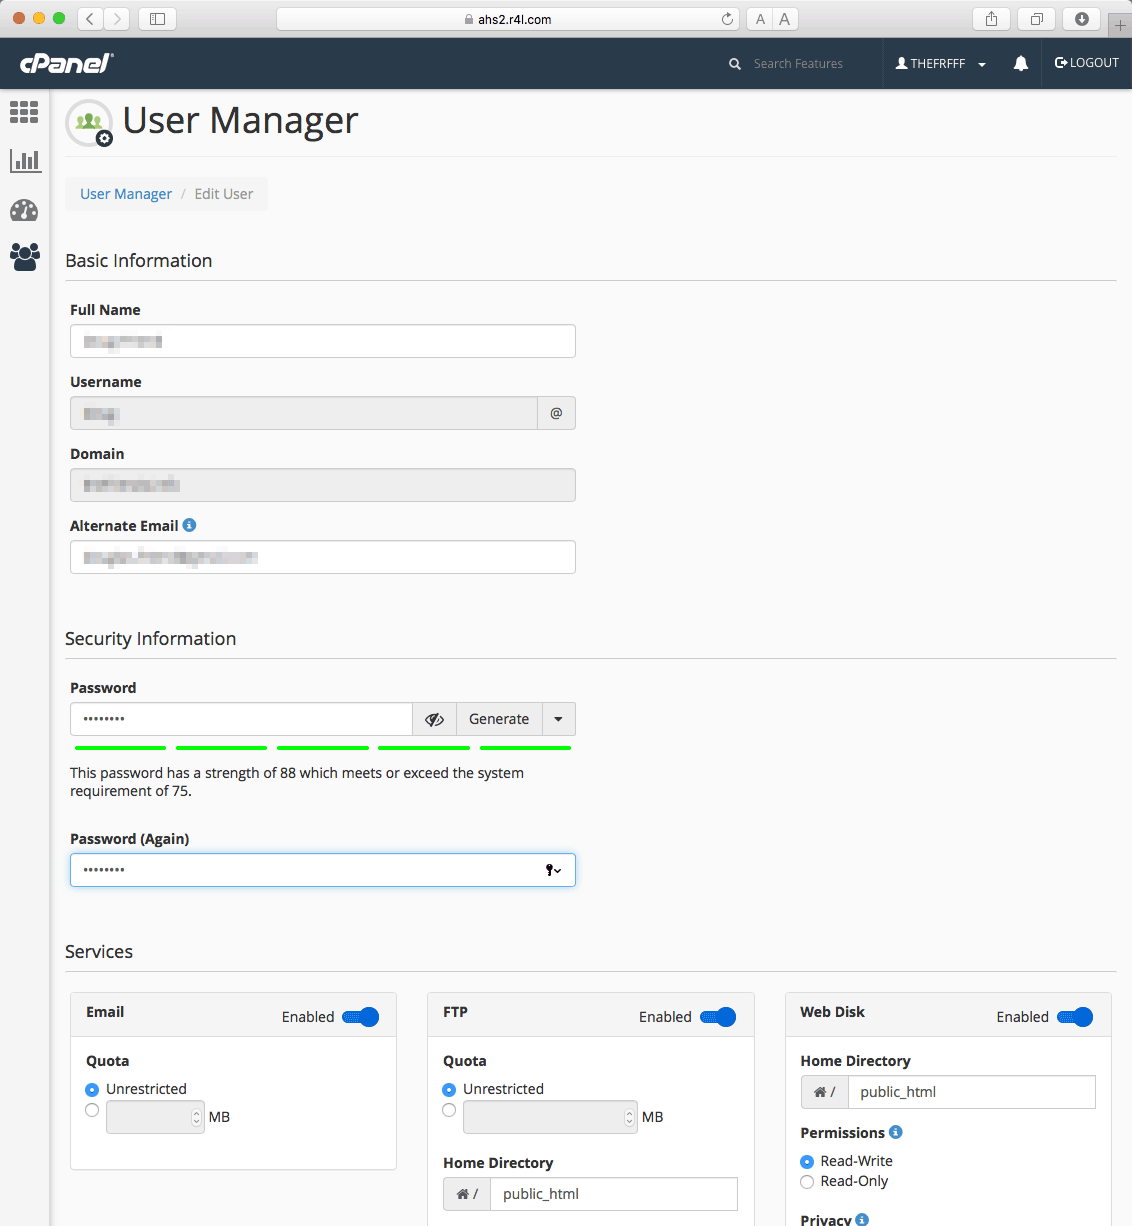
User Manager and Unified Logins

Wednesday, February 24th, 2016

cPanelUnified Logins

In the past, cPanel maintained different specifications/rules for usernames and passwords for email, FTP, and Web Disk.  These different rules meant that users logins for each of these services had to be different.  Requiring different username/password combinations for different services complicates access unnecessarily.

Starting with version 54, cPanel is introducing a new username standard, with all usernames now following a typical email address format.  By implementing a common username format, cPanel account owners can now give end users the same login for email, FTP, and Web Disk, easing account management.

mail-ftp-web-diskThe User Manager

There is now a single interface with which you can quickly create, search, filter and manage User accounts on cPanel.  This streamlined interface provides improvements over existing interfaces, including:

  • A single page User creation screen which can create an email, FTP, and Web Disk account at the same time
  • A simple way to configure and maintain email, FTP, and Web Disk settings for a User in a single page
  • A simple way to link separate email, FTP, and Web Disk accounts that share the same username so your End Users can start taking advantage of a Unified Login immediately
  • Password reset for all of a User’s services in single step

The User Manager List View

manageUsers

The User Manager Create/Edit Screen

editUser

If you have old accounts that have different usernames and passwords, you will see these displayed separately, and have a link to connect them to one synchronized account login.  User accounts can very easily be edited for the users name, email address, alternate email address, and restrictions you would want on their accounts.

Where does this take us?

Usually you will connect to the cPanel using your register4less.com account by navigating to Paid Hosting > Manage Advanced Hosting.  This will then open the cPanel interface as normal.  We do occasionally get requests by domain owners to give their web development person direct access to the cPanel.  While this can be covered by creating a sub-user with permissions enabled for Manage Email hosting and Manage Web Hosting, some developers are more comfortable with accessing the cPanel interface directly.

The cPanel development team are looking to the future and building a robust User Model, which will allow for granting of access to specific cPanel feature sets in addition to the common email, FTP, and Web Disk services.

Login Security Agent Live

Monday, January 25th, 2016

Login Security Agent
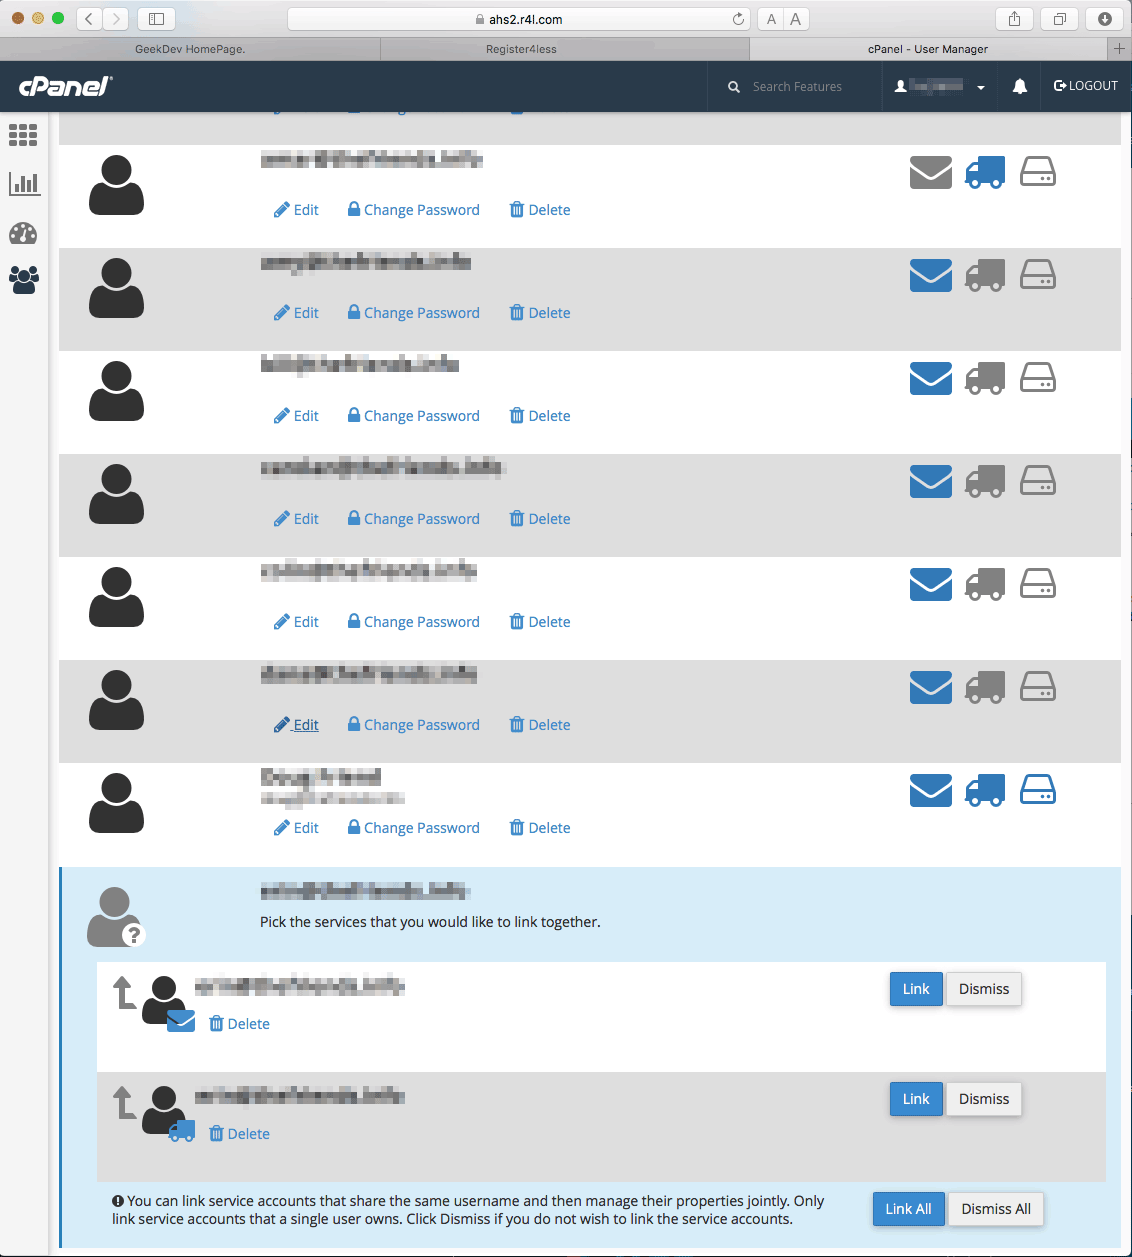
Usually, for the weekly blog post we try to write about something informative, about a new service we’re rolling out, etc.  This past Wednesday, though, we had an interesting incident in our support team we’d like to share with you.

Mid afternoon, William Wakely, an relatively new customer for Register4Less, contacted our support via the secure online chat on our website.  He was reporting that overtime he logged our of his account, his password would get reset.  He was able to log back in by using the email that is sent with the Lost Password function.

Passwords of course will not reset themselves.  The only way for a password to get changed is for someone that is already logged in to go to the menu Profile > Change Password and submit a new password.  Once we were able to confirm William was the true domain owner, we asked him to check the Login Security Agent (LSA) page (also under Profile).

Sure enough, William was able to see there was another login session active from a different IP address.  William provided us with the IP address, and we were able to see this was coming from a different internet service provider from his, and not one that he recognized.

William had not yet setup the LSA kill password, so he did that while we were still on our chat session, and once set up, terminated the other person’s login session, and then reset his password.

We don’t actively track how frequently the LSA kill session function is used, though we could if we went through all of our log files.  It was however interesting and rewarding to be chatting with a customer and help them use this function live.  With any other registrar, the customer and true domain owner would not able been able to kick the other person off of their account, so resolving this problem would not have been easy.  LSA saved the integrity of William’s account!

Reseller Hosting

Monday, January 18th, 2016

advanced-hostingRetail Advanced Hosting Plans

Register4Less.com offers two types of advanced hosting services.  Our regular hosting plans provide web only, email only, and combined web and email hosting on a per domain basis.  These are priced between $1.45/month for our entry level 50MB Agate web hosting plan to $11.95/month for our 25GB web, 100 email (200GB space for mail) Topaz Hosting plan.  All of these plans feature the cPanel (control panel) interface to manage email and web hosting features.  The Trendy Tools web builder is included with all web hosting plans, as is the ability to install WordPress, Joomla, Drupal, PHPbb, PHPList and other applications.

Reseller Advanced Hosting Plans

Our reseller plan allows you to create your own hosting plans, so you can define what disc space is allocation for web and email hosting.  The reseller plans start at $24.95 for our Opal 50GB plan and go up to $79.95 for our Onyx 200GB plan.

With the reseller plan, you can sell web hosting plans directly to your customers, or if you have a lot of domains you want to set up, this allows you to host as many as you wish, provided of course that they fit within the space the plan you have selected allows.

Steps for setting up Reseller Hosting

When you purchase a retail hosting plan, the features this plan has are predefined.  With reseller hosting, you have the freedom of defining different packages you can sell to your customers or assign to your own domains, but you do first have to create these.

WHM vs cPanel

In addition to the cPanel interface to manage the hosting services for your domain, you will have an additional WHM (Web Host Manager) interface to use to manage the other domain you will be setting up to use your hosting service.  To connect to this, log into the domain under which you purchased the reseller hosting package (we’ll call this your reseller domain), and go to Paid Hosting > Web Hosting Manager (WHM).

Defining Packages

The first thing you will want to do once you’ve purchased a reseller hosting plan is to setup your packages.  With WHM open, on the left column click on Packages and then the icon for Add a Package.  You can at any time create, edit or delete a package.  A good example set of features for a hosting package are:

  • Disk Quota (MB) – 1,000
  • Monthly Bandwidth (MB) – unlimited
  • Max FTP Accounts – 10
  • Max Email Accounts – 10
  • Max Email Lists – 10
  • Max Databases – 10
  • Max Sub Domains – unlimited
  • Max Parked Domains – unlimited
  • Max Add-on Domains – 0
  • Maximum Hourly Email by Domain Relayed – unlimited
  • Maximum percentage of failed or deferred messages a domain may send per hour – unlimited

Under Settings, you’ll want CGI Access selected, and the other options not.  Paper lantern is the recommended theme, and choose default for the Feature List.

Once you have completed your settings, make sure you click the blue Save Settings button.

Setting up DNS

When you are adding a domain to your hosting plan, you will need to make sure the DNS is set correctly.  This will have been done automatically for your reseller domain, so what we want to do is configure the domain your adding to have the same DNS setup as your reseller domain.

To do this, instead of typing in all of the settings in the custom DNS zone editor, you will use the DNS > Point Domain(s) to Zone function.  Once on this page, locate the domain you are adding and check the selection box next to it, and the find the Custom Zone box that has your reseller domain in it.  Click the Point to this Zone button in this custom zone box.  You can point more than one domain at a time.

Creating a New Account

Now that you have your packages created and DNS set, you’re ready to add the domain to WHM.  To do this, click on Account Functions, and then Create a New Account.

You will enter in the name of the domain, the username and password (twice), and an email address for the owner of the domain.  You will choose a package from a drop-down list, and should check the option Use the nameservers specified at the Domain’s Registrar.  Leave the Local Mail Exchanger option selected and click the blue Create buttons.

For your customer, they can then login to their cPAnel by entering in the name of their domain and append /cpanel or :2083


Register4Less.com Account Security Features

Monday, December 14th, 2015

Domain security is in our opinion the most important service a registrar can provide for their clients.  The ramifications of an account being compromised are potentially huge.

Encrypted Passwords

Your password, whether it’s for domain management, and FTP password, or access to your email are stored encrypted.  We do keep the last 4 characters of the login password for account verification purposes.  Keeping passwords encrypted in our databases ensure only you (and those to whom you have chosen to share your password) will be able to log into your account with us.  No employee or service provider to register4less.com will ever be able to see your login password.

Login Security Agent

Our patented Login Security Agent provides 24/7 account monitoring, and is set up to notify you when a login session has been created on your account.  In addition to notifying you of a successful login to your account, the LSA service gives you the ability to terminate the login session.

LSA has been designed to deal with the one element of account security that we as a registrar cannot control, the human factor.  Ways in which an account could be compromised include:

  • Leaving a login session active on computer
  • Logging into your account on a public terminal that’s infected with malware
  • Sending an email in plaint text with the account information in the body of the email
  • Leaving login credentials written down, etc.

When you set up LSA on your account, you will specify LSA to send a notification when logging in from a connection on any IP address, or you can specify an IP to be ignored.  You will create a “kill password” with the account as well.  This kill password cannot be changed, so you want to ensure it’s one that you will remember.

Let’s go with the scenario that someone malicious has gained your login username and password, and is logging into your account in order to steal your domains.  As soon as this person logs into your account, you will receive a notice that a login session has been created, and from what IP address the person is connecting.  You will recognize that this is not you logging in.

To kick the hacker off, log into your account, and go to Profile > Login Security Agent.  You’ll enter in the Kill Password, and then click the Kill Sessions button.  The next link the hacker will click will log them off the account.  The login password is automatically reset by LSA when you click the Kill Sessions button.  You’ll then need to change your password to a new one, and your account is now once again secure.

Two Factor Authentication

Two Factor Authentication combines the Google Authenticator app for your smartphone and your normal login password password.  The app will generate a 6 digit number that’s unique to the app that’s running on your phone.  When you log in, you will enter in the 6 digit code after your password (no spaces).

New Online Chat

Tuesday, October 13th, 2015

Secure-Online-ChatYou may have notice that the chat system on Register4Less.com’s website is different.   You’ll see the image on the right on the bottom right of your screen.   Our previous chat application was only available to visitors of our website when they were not logged in.   Our team is extending the availability of chat hours to the following:

  • Weekdays: 8:30 – 20:00
  • Weekends: 10:30 – 20:00

Secure-Chat-MobileOn Mobile devices, the chat icon will look like the green bubble image you see on the right.   The chat application works on all operating systems, tablets & smart phones, not only for you, but from our end as well.  This gives our staff the ability to answer a chat and help a customer even if away from the office.

There are a number of new features that this chat system provides that allows our support team to provide even better customer support for you when you connect with us online.   The chat system opens up new possibilities with new features such as:

  • Our support agent can see what you are typing as you type, allowing us to respond more quickly.
  • The app keeps a history of chats, so if we need to go back to something from a previous session, that’s possible
  • Under Options, you can upload a file (show us a screen shot of the problem you’re having for example), email or print a transcript of your can’t, etc.
  • The chat from our end is not only web based.  Their are native apps for Windows, MacOS, iOS, Android

The team here at R4L always tries to do our best to provide you with the best possible customer service, and we’re all very excited about this new tool that will help extend our hours of support, and provide you with a better customer service experience.

Our Patented Login Security Agent

Friday, September 19th, 2014

As an ICANN accredited registrar, we take the security on your account very seriously. The measures we take include

  • Having any page where sensitive information you provide is SSL encrypted and behind a login session.
  • Optional two factor authentication, where an app on your smart phone or tablet provides 6 digit code you add to your regular password. A new code is generated every thirty seconds.
  • A strength indicator rates your password when you create or update a new password on our system.

(more…)

Two Factor Authentication

Friday, April 25th, 2014
Sample screen shot of iPhone app showing TFA code

TFA – Two Factor Authentication

The development team at R4L has added a new security feature for account login called Two Factor Authentication (TFA).  Once configured, TFA will automatically generate a new 6 digit code every 30 seconds, and this is required with your current login password in order to access your account.

(more…)