Using Customer Service / Support

April 4th, 2016

Smiley SupportOur support team often gets complimented that we have the best support in the industry, and that our customers tell their friends and colleagues about us all the time.  One of our team has even once been “accused” of cloning himself because he’s always there.

As you can imagine, this is of course nice feedback to hear. Then this….

This morning I had a chat session with a customer that’s been with us for a few years, and he was looking for information on how to transfer the registration and hosting away to another provider.  We have domains that transfer in to us and away from us.

Normally when we get a transfer away I inquire as to the reason for the transfer.  The reason he gave was that he could not get the free basic hosting service to work.  I asked if he’d contacted our support team for help, and his initial reply was yes.  I wanted to check with whom he spoke, and turned out he had not contacted our support team, and that’s a shame.

He’s already got the transfer process underway, and of course we recommend our customers rights to move their domains to another registrar if they so choose.  He’s moving to a registrar that does charge for Whois privacy, so will be paying quite a bit more for the registration service.  Moving the domain’s registration and hosting will also not necessarily solve the issues he’s having with hosting.

So the take away from this is if you are having an issue with an R4L service, please get in touch with our support team.  It’s not really possible for our team to know what customers are having issues with connecting to a mail account, server, or other issue unless we hear from you.  Usually these kinds of issues are pretty quick for us to look into, and once resolved, you can get to using the hosting or mail service.  In the case with this particular customer, not only could we have helped him months ago to get his site online, but he’d still be able to take advantage of the free hosting and Whois privacy we provide with the domain registration.  Where he’s transferring doesn’t provide these free services,  so his cost per year will be going up substantially.

Getting in Touch with the R4L Team

Secure Online Chat

Our newest way to get in touch with the support team is via the secure chat from our website.  Simply go to https://Register4less.com and click on Chat Now – Online.  The chat session between you and the agent that answers your chat is fully encrypted, so if you’re renewing a service with us, it’s safe to provide payment information over the chat.  All chat sessions automatically will create a transcript in our support ticketing system.

Support Ticketing – Email

Our support address is support@Register4Less.com, or support@R4L.com.  All email there gets tracked by a ticketing system.  Tickets can be transferred between agents, be assigned a reminder date, etc.

Toll-Free Phone

You can also reach our team by calling within the US and Canada toll free 1 (877) 905 – 6500.  Outside of North America, call int + 1 (514) 905-6500.  If you are calling outside of our core office hours (9 – 5 Eastern), please leave a voice message and we will call you back as soon as we are able.
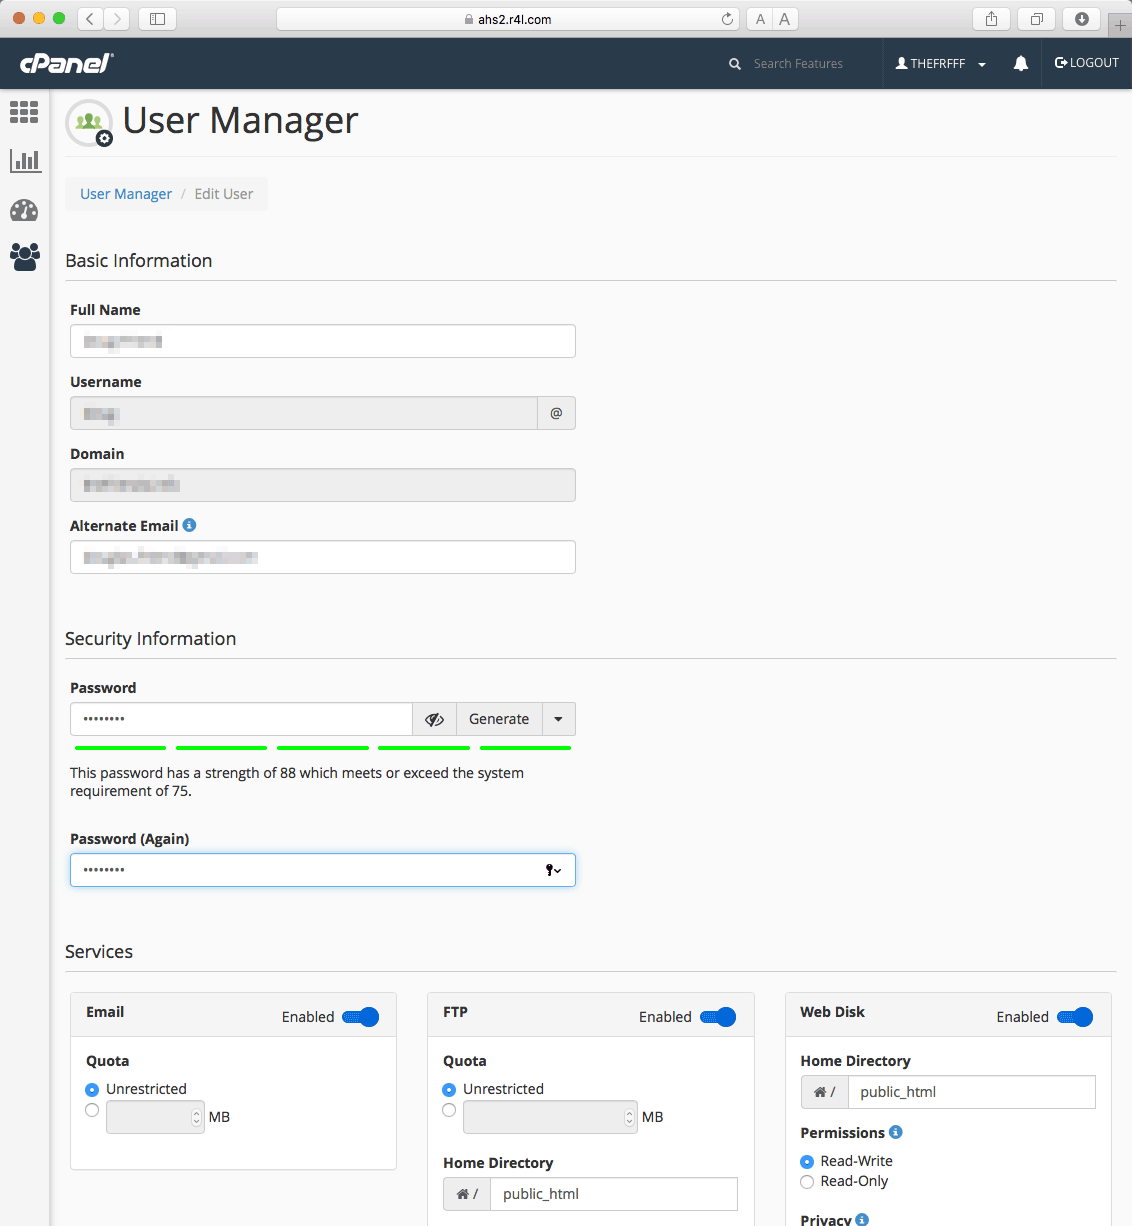
How to Create a SPAM Filter

March 15th, 2016

Less Spam with GreylistingAhh, spam. Nobody likes spam. As a hosting provider, we really don’t like spam. But there are steps you can take to help protect your inbox from spammers. That’s why we have specific tools available to you in the cPanel interface to deal with spam. Some of these like BoxTrapper we’ve written about before.

SpamAssassin

Preloaded into the cPanel dashboard, SpamAssassin is an open-source tool built to filter and classify emails while blocking spam. Through a combination of subject line and body text analysis, Bayesian filtering, and DNS blacklists, SpamAssassin drastically limits and can  prevent spam from touching your inbox.

Creating a Spam Filter

In the Mail section of your cPanel account, choose Apache SpamAssassin. By default, Apache SpamAssassin is enabled.

Now you’re ready to set up email filters and specify how powerfully you’d like SpamAssassin to gate and vet incoming messages.

First, head to the “Email” section, navigate to “Global Filters,” and select “Create New Filter.”

Then, select “Spam Bar” from the first menu in the “Rules” section and then choose “Contains”from the second menu in that same section.

In that field, enter a spam score using a series of (+++++) symbols, with 5 being an adequate number for an individual user.  Lower numbers here mean a more aggressive spam filter.  Select “Deliver to folder” from the “Actions” section and enter the name of the folder (usually Junk or Spam) to which you would like to direct spam.  We don’t recommend deleting spam with this particular filter

Finally, click “Create” to activate the spam filter and, voila, your first filter is set up! (Be sure to check to occasionally check this folder to ensure items that are NOT spam aren’t being flagged.)

If you are getting spam that has specific patterns in the subject, from or to address or other part of the header, you can filter against these patterns as well.

Webmail Calendars & Contacts

March 7th, 2016

Calendars and Contacts Setup

With Register4Less's email service, you can maintain your contacts and calendar within your domain-based webmail interface, and access these using your smartphone. This can also be accessed from your desktop's contacts and calendar apps.

To set this up (example given here is iOS 8 on an iPhone), follow these steps:

Tap Settings

Tap on Mail, Contacts, Calendars, and then on Under Accounts, tap Add Account

Choose Other for the account type.

How to Set Up Your Calendars

Tap Add CalDav Account

Enter your email address account information:

Server will be in the form of: ahsN.R4L.com:2080 where N is a number.  

To determine your server name, go on your web browser, and type in http://webmail. plus your domain. You will be forwarded to https://ahsN.r4l.com:2096. The N of course will be the actual number of the server, so something like ahs4.R4L.com.

Username is your complete email address.

Password is of course the password you have created the account with. If you're not sure what this is, you can reset the password, but you will then need to change this on any device you use to connect to your email.

Description is optional.  It is simply a text description to differentiate different accounts if you are connecting more than one.

A Note About Port Numbers

In the URLs above, :2080 and :2096 are the port numbers on the server being connected to. 2080 is the port reserved to connect to CalDav, and 2096 is the port for encrypted webmail login.


How to Set Up Your Contacts

Tap Add CardDav Account

Enter your email address account information:


All of the settings for server, username and password will be the same as for configuring your contacts.

User Manager and Unified Logins

February 24th, 2016

cPanelUnified Logins

In the past, cPanel maintained different specifications/rules for usernames and passwords for email, FTP, and Web Disk.  These different rules meant that users logins for each of these services had to be different.  Requiring different username/password combinations for different services complicates access unnecessarily.

Starting with version 54, cPanel is introducing a new username standard, with all usernames now following a typical email address format.  By implementing a common username format, cPanel account owners can now give end users the same login for email, FTP, and Web Disk, easing account management.

mail-ftp-web-diskThe User Manager

There is now a single interface with which you can quickly create, search, filter and manage User accounts on cPanel.  This streamlined interface provides improvements over existing interfaces, including:

  • A single page User creation screen which can create an email, FTP, and Web Disk account at the same time
  • A simple way to configure and maintain email, FTP, and Web Disk settings for a User in a single page
  • A simple way to link separate email, FTP, and Web Disk accounts that share the same username so your End Users can start taking advantage of a Unified Login immediately
  • Password reset for all of a User’s services in single step

The User Manager List View

manageUsers

The User Manager Create/Edit Screen

editUser

If you have old accounts that have different usernames and passwords, you will see these displayed separately, and have a link to connect them to one synchronized account login.  User accounts can very easily be edited for the users name, email address, alternate email address, and restrictions you would want on their accounts.

Where does this take us?

Usually you will connect to the cPanel using your register4less.com account by navigating to Paid Hosting > Manage Advanced Hosting.  This will then open the cPanel interface as normal.  We do occasionally get requests by domain owners to give their web development person direct access to the cPanel.  While this can be covered by creating a sub-user with permissions enabled for Manage Email hosting and Manage Web Hosting, some developers are more comfortable with accessing the cPanel interface directly.

The cPanel development team are looking to the future and building a robust User Model, which will allow for granting of access to specific cPanel feature sets in addition to the common email, FTP, and Web Disk services.

Keep Spam off your WordPress Site/Blog II

February 17th, 2016

Less Spam with GreylistingThis is part 1 of a 2 part post.  You’ll find Part 1 of this post here.

More Anti-Spam Plugins

WP Spam Fighter

WP Spam Fighter checks two different parameters to the comment submission.

  1. The time the commenter has taken to submit the comment, and
  2. If any hidden fields were completed with the comment submission.

If the time is too short or fields that are hidden from the screen (but visible to a bot) are filled in, the comment will be rejected outright, as these don’t follow human behaviour.

Anti-Spam by Cleantalk

captcha
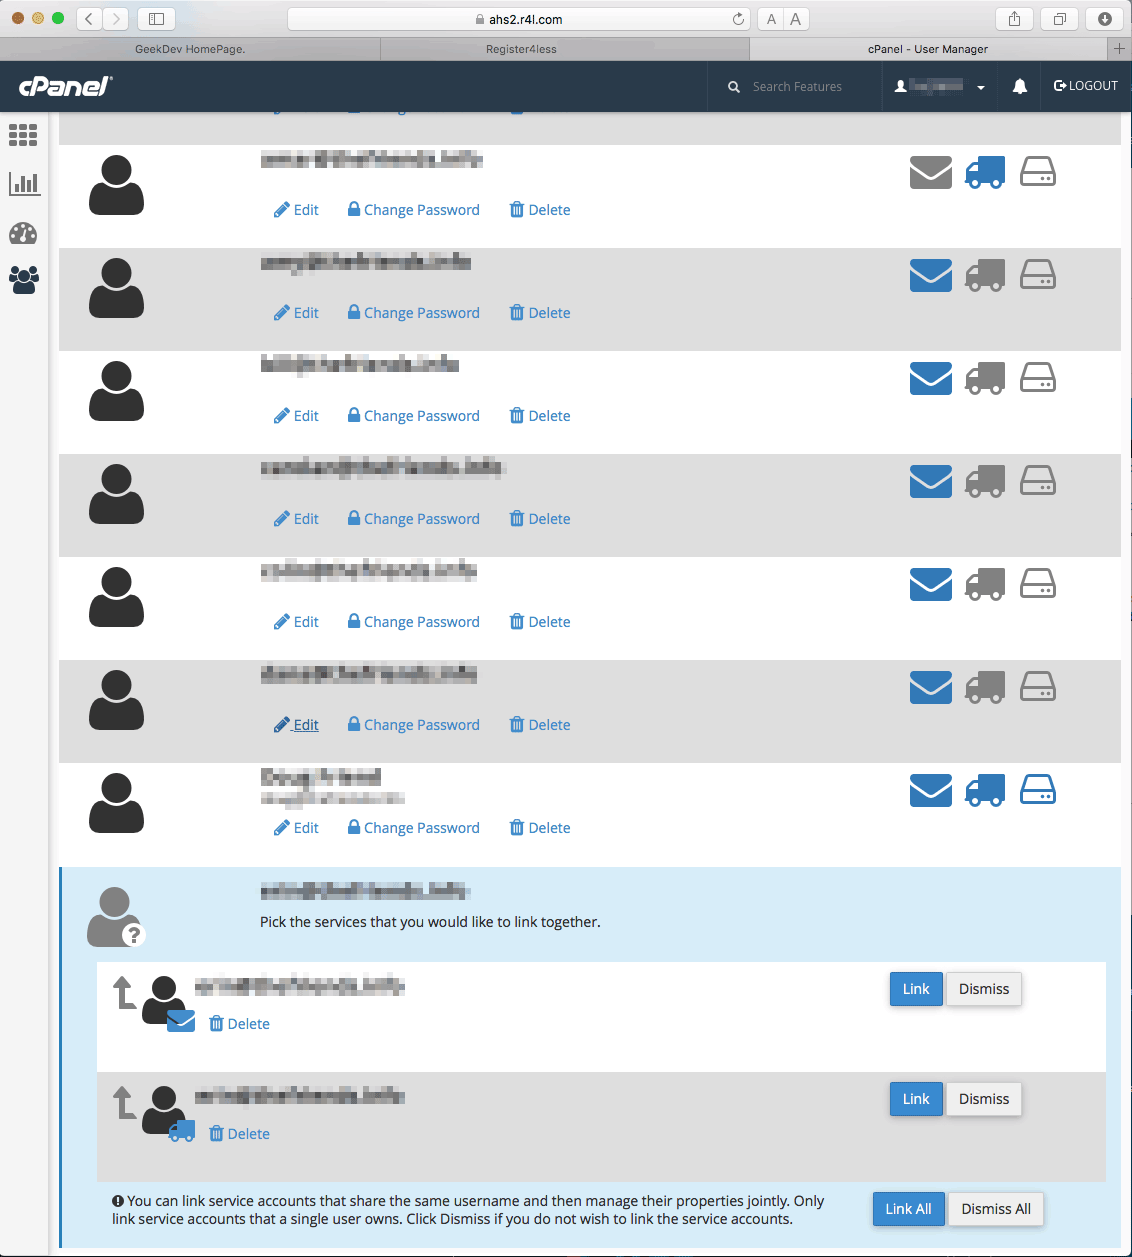
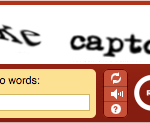
A lot of sites will use a captcha with the form that needs to be entered in correctly in order for the comment to be accepted.  While captchas certainly will help reduce spam, it puts the load on your visitor to fill this in correctly, and you risk annoying them or stopping them from submitting a valid comment.

The Anti-Spam plugin stops spam comments, registrations, orders, bookings and more, all without the need of a captcha.

Quick Install, Less Spam!

The recommended plugins only take a matter of minutes to install onto your WordPress site, and once activated, will go to work for you in the background to prevent spam comments and ping backs.  Disabling comments on older posts can be simply the matter of doing a quick edit on the last post that has comments / ping backs enabled when you publish a new post.  Just a habit to get into.  With these practices and plugins in place, you should see a dramatic reduction in the amount of spam that comes in from your WordPress site.


Keeping Spam off your WordPress site/blog

February 9th, 2016

Less Spam with GreylistingThis is part 1 of a 2 part post.

If you’re hosting a WordPress site/blog, chances are, you’re going to have to deal with spam comments being posted to your site.  WordPress is the most popular CMS (Content Management System) environment in use by developers, with over 25% of websites globally now running WordPress.  While it’s undeniably a powerful and flexible platform with which to build your site, it’s also the number 1 targeted platform for spammers.

Can’t I Just Ignore Spam?

Some people new to hosting sites will leave spam comments on their websites, thinking the appearance of comments & ping backs will look like their website is getting increased traffic and interest.  Reasons you don’t want to do this include:

  • Bad links will hurt your search engine placement.  Google and other search engines are cracking down on bad links.  If your site is linking to known unrepeatable sources, you will likely see your SEO rankings decline.
  • Spam on your website tells your visitors you’re not paying attention to your website.  Generally visitors to  your site will see spam comments for what they are.  This essentially tells your site visitors that you’re not keeping up with the management of your site’s content.
  • Spam will slow down your website.  Spam creates unnecessary additional content for your website to load, and can grow quite quickly if not managed.  This will add time for every page to load on your website, and encourages visitors to abandon the page load and go elsewhere.
  • Most Spam comments and trackbacks contain links.  More bad news for your site’s visitors.  Many of these links go back to virus/malware, which if followed, could lead to your visitor’s computer becoming infected, and possibly their computer/email account becoming compromised.

Now that you understand why it’s important to keep up maintenance of your website and keep comments & ping backs free from spam, let’s look at some approaches to help you accomplish this.

Automatically Filter Spam Using an Anti-Spam Plugin

By default, the anti-spam filter Akismet is installed and waiting for you to activate it.  To do so, simply log into your WordPress dashboard, click on Plugins, and activate for Akismet.  You will need to register with them to get the plugin running.  Akismet will trap spam and notify you by email when new comments are awaiting moderation.

Regularly Check and Approve/Decline Comments

A continuation of the first point, Akismet will trap comments posted to your site, and allow you to Approve, Trash, or mark comments as Spam.  Letting Akismet know a comment is spam also will help train its filter.  No spam filter is perfect, so sometimes Akismet will place a legitimate comment or pingback into the spam folder.  You should not just delete everything thats been tagged as spam, but go through to make sure legitimate comments get approved.

Disable Comments After a Period of Time

If you’re writing posts to your site, consider disabling comments to the posts after real comment traffic has settled down.  What this period will be will depend on your site and how active comments are given a post you’ve put up.

More coming next week.

We’ll post part two of this next week.  Until then….

Login Security Agent Live

January 25th, 2016

Login Security AgentUsually, for the weekly blog post we try to write about something informative, about a new service we’re rolling out, etc.  This past Wednesday, though, we had an interesting incident in our support team we’d like to share with you.

Mid afternoon, William Wakely, an relatively new customer for Register4Less, contacted our support via the secure online chat on our website.  He was reporting that overtime he logged our of his account, his password would get reset.  He was able to log back in by using the email that is sent with the Lost Password function.

Passwords of course will not reset themselves.  The only way for a password to get changed is for someone that is already logged in to go to the menu Profile > Change Password and submit a new password.  Once we were able to confirm William was the true domain owner, we asked him to check the Login Security Agent (LSA) page (also under Profile).

Sure enough, William was able to see there was another login session active from a different IP address.  William provided us with the IP address, and we were able to see this was coming from a different internet service provider from his, and not one that he recognized.

William had not yet setup the LSA kill password, so he did that while we were still on our chat session, and once set up, terminated the other person’s login session, and then reset his password.

We don’t actively track how frequently the LSA kill session function is used, though we could if we went through all of our log files.  It was however interesting and rewarding to be chatting with a customer and help them use this function live.  With any other registrar, the customer and true domain owner would not able been able to kick the other person off of their account, so resolving this problem would not have been easy.  LSA saved the integrity of William’s account!

Reseller Hosting

January 18th, 2016

advanced-hostingRetail Advanced Hosting Plans

Register4Less.com offers two types of advanced hosting services.  Our regular hosting plans provide web only, email only, and combined web and email hosting on a per domain basis.  These are priced between $1.45/month for our entry level 50MB Agate web hosting plan to $11.95/month for our 25GB web, 100 email (200GB space for mail) Topaz Hosting plan.  All of these plans feature the cPanel (control panel) interface to manage email and web hosting features.  The Trendy Tools web builder is included with all web hosting plans, as is the ability to install WordPress, Joomla, Drupal, PHPbb, PHPList and other applications.

Reseller Advanced Hosting Plans

Our reseller plan allows you to create your own hosting plans, so you can define what disc space is allocation for web and email hosting.  The reseller plans start at $24.95 for our Opal 50GB plan and go up to $79.95 for our Onyx 200GB plan.

With the reseller plan, you can sell web hosting plans directly to your customers, or if you have a lot of domains you want to set up, this allows you to host as many as you wish, provided of course that they fit within the space the plan you have selected allows.

Steps for setting up Reseller Hosting

When you purchase a retail hosting plan, the features this plan has are predefined.  With reseller hosting, you have the freedom of defining different packages you can sell to your customers or assign to your own domains, but you do first have to create these.

WHM vs cPanel

In addition to the cPanel interface to manage the hosting services for your domain, you will have an additional WHM (Web Host Manager) interface to use to manage the other domain you will be setting up to use your hosting service.  To connect to this, log into the domain under which you purchased the reseller hosting package (we’ll call this your reseller domain), and go to Paid Hosting > Web Hosting Manager (WHM).

Defining Packages

The first thing you will want to do once you’ve purchased a reseller hosting plan is to setup your packages.  With WHM open, on the left column click on Packages and then the icon for Add a Package.  You can at any time create, edit or delete a package.  A good example set of features for a hosting package are:

  • Disk Quota (MB) – 1,000
  • Monthly Bandwidth (MB) – unlimited
  • Max FTP Accounts – 10
  • Max Email Accounts – 10
  • Max Email Lists – 10
  • Max Databases – 10
  • Max Sub Domains – unlimited
  • Max Parked Domains – unlimited
  • Max Add-on Domains – 0
  • Maximum Hourly Email by Domain Relayed – unlimited
  • Maximum percentage of failed or deferred messages a domain may send per hour – unlimited

Under Settings, you’ll want CGI Access selected, and the other options not.  Paper lantern is the recommended theme, and choose default for the Feature List.

Once you have completed your settings, make sure you click the blue Save Settings button.

Setting up DNS

When you are adding a domain to your hosting plan, you will need to make sure the DNS is set correctly.  This will have been done automatically for your reseller domain, so what we want to do is configure the domain your adding to have the same DNS setup as your reseller domain.

To do this, instead of typing in all of the settings in the custom DNS zone editor, you will use the DNS > Point Domain(s) to Zone function.  Once on this page, locate the domain you are adding and check the selection box next to it, and the find the Custom Zone box that has your reseller domain in it.  Click the Point to this Zone button in this custom zone box.  You can point more than one domain at a time.

Creating a New Account

Now that you have your packages created and DNS set, you’re ready to add the domain to WHM.  To do this, click on Account Functions, and then Create a New Account.

You will enter in the name of the domain, the username and password (twice), and an email address for the owner of the domain.  You will choose a package from a drop-down list, and should check the option Use the nameservers specified at the Domain’s Registrar.  Leave the Local Mail Exchanger option selected and click the blue Create buttons.

For your customer, they can then login to their cPAnel by entering in the name of their domain and append /cpanel or :2083


Why Whois Privacy Matters

January 11th, 2016

Privacy button. White enter key and white keyboard.

Would you post your full address, email & phone number on your facebook wall?  Of course not.  So why would anyone want that information readily available in your domain’s Whois record?

When a domain name is registered, we are required by ICANN’s policy to collect personal/company contact information for the domain. This consists of the owner’s first & last name, company name (if applicable), postal address, email address, phone number and optional fax number. Without Whois privacy, this information would immediately be published in the domain’s Whois record.  The Whois database is an important part of the structure of how domains are registered, but more often than not, they are scanned using computer programs to put together a database of email addresses to be used by marketers, to send spammers, scammers, even identity thieves.

Without Whois privacy, a domain’s Whois record will look like (of course, not actual contact information):

ExampleDomain.com
John Doe, Doe’s Widget Company Inc.
123 Maplewood Drive, Los Angeles, CA, USA
+1.3105551234

With Whois privacy enabled, this same domain would appear:

ExampleDomain.com
Register4Less Privacy Advocate, 3501256 Canada Inc.
5802 Bob Bullock C1 Unit 328C-195, Laredo, TX, USA
+1.5143941150

Why not just have fake contact info?

Some will ask, why not just provide fake information with the domain registration?  There are a number of reasons why that’s not a good idea.

  1. Legally, all domain name owners are bound by the registration agreement between you and your domain’s registrar.  ICANN mandates that this registration agreement must include the clause that you will maintain accurate and up to date contact information for your domain.  Under the registration agreement, if you do not keep your information complete and updated, your domain is subject to suspension.
  2. With the update 2013 Registrar Registry Agreement, ICANN is now requiring registrars to confirm the email address of the domain owner.  When a domain is registered or a domain is updated with an email address that’s not already confirmed, we send an email out to that address for confirmation.  If the email bounces or is not replied to, we are required to suspend the domain.
  3. The contact information you maintain on account with us is what we use to send you reminders for your domain registration or hosting renewal.  If the address is not working, you’ll miss the reminders and may forget to renew your domain.  That can cause downtime, and the potential for a redemption renewal (much more costly due to higher fees from the registry, or worse, loss of the domain.  If that happens and a domain speculator picks it up, you’re at their mercy to buy the domain back.

Protect Your Identity

Identity theft is a crime that is on the rise.  The best way to not have your personal contact information taken is not to make publicly available.  When you register a new domain, choose to have Whois privacy enabled when you submit your order.

Avoid Unwanted Solicitations

Spammers regularly query the Whois servers of domain registrars in order to build a database of working email addresses.  If your domain is not private, you can expect to receive emails with offers to buy your domain, to congratulate you that you’ve been awarded a $15 Million, life and health insurance offers, etc.  You should also ensure never to put your email address in plain text in a website.

Upgrade Now for Free

Register4Less was one of the first registration providers to introduce Whois privacy back in 2002.  At that time, a number of registrars were sending mail to domain owners with what looked confusingly like an invoice for the renewal of their domains (at rates 3 times higher than our fees).  A number of domain owners were tricked by these solicitations, and sent off their payment to these companies.  While we helped customers cancel these transfers and get their money back, we knew we needed to come up with something to help prevent this abuse.

The Whois privacy service we developed has always been provided free of charge to our customers.  We fully intend to keep this service free of charge for our customers.  It’s part of what makes us the non-evil domain registration and web hosting company!

Webmail – Three Available Interfaces

January 4th, 2016

WEBMAILAPSIn addition to connecting to your email account via a mail client on your computer, tablet or smartphone, you have the choice of three webmail programs from the cPanel.  You can connect to the login screen for your webmail in two different ways:

  • Go to http://webmail. plus your domain, or
  • Login to manage your domain, open the cPanel, and click the Email accounts icon.  Where each email account is listed you’ll see More on the right side.  Click this and then Access Webmail.

Webmail is one of the most commonly used functions of the cPanel interface.

horde

The Horde Project is an open-source development community that is responsible for the creation of many applications.  Based on PHP, Horde developers have created not only a robust webmail interface, but also complementary widgets that range from calendars, notes, message filtering and message flagging, and powerful search tools.

roundcube

RoundCube is the world’s most popular open source Webmail interface, and is the one the R4L staff recommends setting as your default.  While not as feature rich as Horde, RoundCube features a modern drag-and-drop interface.  RoundCube also features search tools, flagging tools to easily organize your Inbox, Sent, and other folders.

squirrelmail

SquirrelMail is the most streamlined of the three available webmail applications.  SquirrelMail does provide an address book feature, mail composition can only be done in plain text, sending email with HTML formatting is not possible with SquirrelMail.

Softaculous Defaults & WordFence

December 28th, 2015

softboxbigNew Softaculous Default Settings

If you’re using our cPanel based hosting, the R4L team has made a change to the default settings for the software installation program Softaculous.
When installing WordPress, automatically now a security plugin called WordFence will be installed.  We are also changing the default settings when installing WordPress so that WordPress itself, plugins and themes will automatically stay updated.

WordFence

wordfence-logo-429x324With over 10.7 million downloads, WordFence is the most downloaded WordPress security plugin, and reputedly the best security plugin.  WordFence will help you scan your site for malware/hacks, and help clean the site if problems are detected.

Updating Your Settings

 With WordFence installed, you will want to update some of the settings to make the most of its features.  To do this, go to WordFence on the left column, and and click on Options.  Click Here or documentation WordFence Options.  Apart from the default settings, we recommend the following:

 Basic Options:

  • Where to email alerts: — Enter in your email address

Click the Save Changes button before advancing to the advanced options.

Advanced Options:

 Alerts:

These will depend on how many sites you manage, and how many users you have using your site.  For high volume applications, leave only Alert when an IP address is blocked, Alert when someone is locked out from login, and Alert me when someone with administrator access signs in checked.

Firewall Rules:

  • Check Immediately block fake Google crawlers.  It provides false traffic numbers.
  • 404’s that exceed 2 per minute, choose throttle it
  • How long is an IP address blocked when it breaks a rule, choose the maximum 1 month

 Login Security Options:

  • Choose Force admins and publishers to use strong passwords
  • Lock out after how many login failures, default is 5, recommend 2 or 3
  • Lock out after how many forgot password attempts, default is 5, recommend 2
  • Amount of time a user is locked out, set to 60 days
  • Immediately block the IP of users who try to sign in as these usernames, set admin

Of course, your admin username must not be “admin”.  These settings help protect against brute force attacks

.com = .anything

December 21st, 2015

google-logoOne of the Internet’s most valuable and very  carefully guarded secret is the complex algorithm used by the search giant Google uses to rank pages on the Internet.  Recently, though, Google announced in a web post that the search performance of the new gTLDs “will not be treated differently” from legacy gTLDs like .com and .net.   Any business or person considering moving their website to one of the new gTLDs

This is good news for owners of hundreds of new gTLDs (generic Top Level Domain) like .website, .works or .company and for businesses that are thinking of moving from a longer .com domain name to a shorter name with one of these descriptive gTLDs.  This is also very good news for the companies that operate the registries for these new extensions.

In the article, google provides four steps to make sure that your website’s current rankings will follow to new descriptive gTLD site.

  • You will of course need to build your new site (or move the existing content over to the new site), but more importantly to test the new site throughly.
  • You need to put together a URL mapping from the current to the new site’s pages.
  • When you move the site, you will want to setup 301 redirection from the old to the new site.
  • Finally, you’ll want to monitor traffic on the old and the new site to ensure the move is completely successful.

An example Google is showingFrom the post, it would seem Google is very much in favour of the new gTLDs for brand identity, brand protection & promotions.